In the fast-paced world of software engineering, where APIs handle millions of requests per second and systems must scale gracefully under pressure, controlling traffic is non-negotiable. Enter rate limiting: the art of saying “no” politely to prevent overload, abuse, or downtime. But with so many algorithms out there—like the leaky bucket, token bucket, or fixed window—how do you choose the right one?
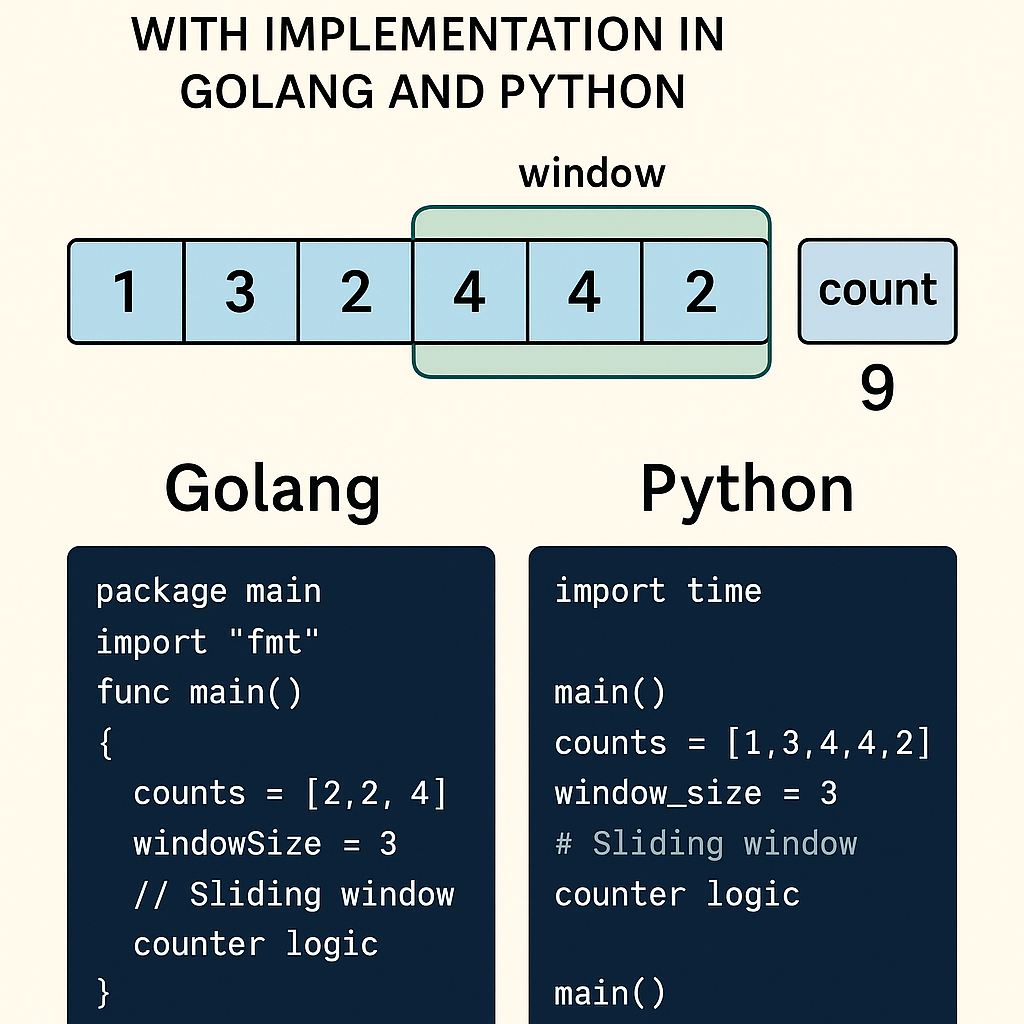
Today, we’re zeroing in on the Sliding Window Counter Algorithm, a powerhouse that’s elegant, efficient, and battle-tested in high-traffic environments. It’s the go-to choice for companies like Cloudflare, Stripe, and AWS when they need accurate rate limiting without burning through resources. If you’ve ever wondered how to enforce limits like “100 requests per minute” without letting sneaky bursts slip through, this deep dive is for you.
We’ll unpack its inner workings, compare it to alternatives, provide a hands-on code example, and explore real-world applications. By the end, you’ll be equipped to implement it in your own projects. Let’s slide right in!
The article is a part of Rate Limiting algorithms tutorial series:
3- Fixed Window Counter Algorithm
What is the Sliding Window Counter Algorithm?
At its core, the Sliding Window Counter is a rate-limiting technique that builds on the broader sliding window concept. Unlike a fixed window (which resets abruptly at set intervals, allowing problematic bursts), this algorithm maintains a “sliding” view of time, ensuring a smooth, rolling enforcement of limits.
Think of it as a window that glides along a timeline, always looking back exactly the duration of your rate limit (e.g., the last 60 seconds). But here’s the twist: instead of logging every single request (which can be memory-intensive), it uses counters for just two windows—the current one and the previous one—and applies a clever weighting system to approximate the rate.
This hybrid approach was popularized in distributed systems and API gateways, evolving from earlier fixed-window methods to address their shortcomings. It’s particularly useful in scenarios where precision matters but scalability can’t be compromised.
Why Not Just Use a Fixed Window?
Before we dive deeper, let’s quickly revisit why simpler methods fall short. In a fixed window counter:
- Time is divided into rigid buckets (e.g., 1-minute intervals).
- You count requests per bucket and reset at the end.
The issue? Boundary exploitation. A user could send 100 requests at 59 seconds into the window, then another 100 right after reset—effectively doubling the rate in a tiny timeframe. The sliding window counter fixes this by blending data from adjacent windows, providing a more accurate “rolling” count.
How the Sliding Window Counter Works: A Step-by-Step Breakdown
Let’s break it down with a concrete example. Suppose your limit is 100 requests per 60 seconds.
Key Components
- Window Size: The time frame for your limit (e.g., 60 seconds).
- Current Window Counter: Tracks requests in the ongoing window.
- Previous Window Counter: Stores the count from the just-ended window.
- Weighting Factor: A percentage that determines how much of the previous window “overlaps” with the current sliding view.
The Algorithm in Action
- Initialize Counters: Start with
current_count = 0andprevious_count = 0. Note the start time of the current window. - Handle a New Request: When a request arrives at timestamp
now:- Check if the current window has expired (e.g., if
now>current_start + 60). If so:- Shift: Set
previous_count = current_count. - Reset
current_count = 0. - Update
current_start = now(or align to the next window boundary for consistency).
- Shift: Set
- Calculate the time elapsed in the current window:
elapsed = now - current_start. - Compute the weight for the previous window: This is the portion of the previous window still within the sliding 60 seconds. Formula:
weight = (window_size - elapsed) / window_size.- Example: If 45 seconds have elapsed (75% through), the weight is
(60 - 45)/60 = 0.25(25% of the previous window counts).
- Example: If 45 seconds have elapsed (75% through), the weight is
- Estimate the total requests in the sliding window:
estimated = (previous_count * weight) + current_count.
- Check if the current window has expired (e.g., if
- Decision Time:
- If
estimated < limit, allow the request and incrementcurrent_count. - If
estimated >= limit, reject it (e.g., return HTTP 429).
- If
- Repeat: The window “slides” naturally as time progresses.
Real-World Example
- Setup: Limit = 100 req/60s.
- At 10:00:00: Window starts. User sends 80 requests by 10:00:59 →
previous_count = 80(after shift). - At 10:01:45: (45s into new window,
current_count = 50so far).- Elapsed = 45s → Weight = (60-45)/60 = 0.25.
- Estimated = (80 * 0.25) + 50 = 20 + 50 = 70.
- 70 < 100 → Allow and set
current_count = 51.
- At 10:01:59: Another request. Elapsed ≈59s → Weight ≈ (60-59)/60 = 0.0167.
- Estimated = (80 * 0.0167) + 51 ≈ 1.33 + 51 = 52.33 < 100 → Allow.
This prevents bursts while keeping enforcement fair and accurate.
Comparing Sliding Window Counter to Other Algorithms
To appreciate its strengths, let’s stack it up against popular alternatives:
- Fixed Window Counter: Simpler and cheaper, but prone to bursts (as mentioned). Sliding window counter adds accuracy with minimal extra complexity.
- Token Bucket: Allows bursts up to a “bucket” size, then refills at a steady rate. Great for variable traffic, but can be overkill if you need strict per-window limits. Sliding window is more precise for rolling rates.
- Leaky Bucket: Smooths traffic like a queue, preventing bursts entirely. It’s FIFO-based, whereas sliding window counter is count-based and easier to implement in distributed setups.
- Sliding Window Log: A “purer” sliding window variant that logs every timestamp. More accurate but memory-hungry (O(n) space). The counter version trades a tiny bit of precision for O(1) space—ideal for scale.
In benchmarks, sliding window counter often wins for balanced performance: low latency, low memory, and high accuracy (typically 95-99% precise).
Advantages and Disadvantages
Pros
- Burst Prevention: Eliminates edge-case exploits.
- Efficiency: Constant time and space complexity—perfect for high-throughput systems.
- Fairness: Treats users equitably by considering rolling time.
- Scalability: Easy to distribute with tools like Redis (use sorted sets or hashes for counters).
Cons
- Approximation Error: The weighting is an estimate; it assumes uniform distribution in the previous window (real requests might cluster).
- Clock Sync Issues: In distributed systems, ensure clocks are synchronized (e.g., via NTP).
- Complexity: Slightly more involved than fixed windows, but the payoff is worth it.
Pitfall to watch: If windows aren’t aligned properly, you might get minor inaccuracies—use atomic operations in storage.
Real-World Use Cases and Advanced Applications
This algorithm powers rate limiting in:
- API Gateways: AWS API Gateway and Kong use similar mechanisms to throttle endpoints.
- Security: Limiting login attempts to thwart brute-force attacks (e.g., 5 tries per 5 minutes).
- Microservices: In Kubernetes, enforce inter-service call rates to prevent cascading failures.
- Web Scraping Defense: Sites like LinkedIn use it to cap bot activity.
Advanced Twists:
- Distributed Implementation: Store counters in Redis with TTLs for auto-expiration.
- Multi-Key Limiting: Track per-user, per-IP, or per-API key using hashed keys.
- Adaptive Windows: Dynamically adjust limits based on system load.
Sliding Window Counter Algorithm In Golang and Echo Framework
Below is a complete code example implementing the Sliding Window Counter Algorithm as rate-limiting middleware in Go, using the Echo Framework.
I’ve kept it simple and in-memory for demonstration purposes (suitable for a single-instance app). In a production environment, you’d want to use a distributed store like Redis to handle counters across multiple instances and ensure atomicity (e.g., via Redis hashes or sorted sets with expiration). I’ve added comments for clarity and notes on potential improvements.
Key Notes:
- Rate Limiting Logic: Mirrors the sliding window counter from this article—uses current and previous window counts with a weighting factor to estimate the rolling rate.
- Middleware: The rate limiter is applied as Echo middleware. It checks the limit before proceeding to the handler. If exceeded, it returns HTTP 429 (Too Many Requests).
- Global Limiting: This example applies a global limit (e.g., across all users). To make it per-IP or per-user, you could use a map of limiters keyed by
c.RealIP()or a token from headers. - Dependencies: Install Echo and Echo Middleware:
-
go get github.com/labstack/echo/v4. go get github.com/labstack/echo/v4/middleware.
-
Here is the code:
package main

import (
	"net/http"
	"sync"
	"time"

	"github.com/labstack/echo/v4"
	"github.com/labstack/echo/v4/middleware"
)

// SlidingWindowCounter is a struct for the rate limiter.
// It maintains counters for the current and previous windows.
type SlidingWindowCounter struct {
	limit         int   // Max requests per window
	windowSize    int64 // Window size in seconds (e.g., 60)
	currentCount  int   // Requests in current window
	previousCount int   // Requests in previous window
	windowStart   int64 // Unix timestamp of current window start
	mu            sync.Mutex
}

// NewSlidingWindowCounter creates a new rate limiter.
func NewSlidingWindowCounter(limit int, windowSize int64) *SlidingWindowCounter {
	return &SlidingWindowCounter{
		limit:         limit,
		windowSize:    windowSize,
		windowStart:   time.Now().Unix(),
		currentCount:  0,
		previousCount: 0,
	}
}

// AllowRequest checks if a request is allowed under the rate limit.
// Returns true if allowed (and increments count), false if rejected.
func (s *SlidingWindowCounter) AllowRequest() bool {
	s.mu.Lock()
	defer s.mu.Unlock()

	now := time.Now().Unix()

	// Check if we've moved to a new window
	if now >= s.windowStart+s.windowSize {
		s.previousCount = s.currentCount
		s.currentCount = 0
		s.windowStart = now
	}

	// Calculate elapsed time and weight
	elapsed := now - s.windowStart
	var weight float64
	if elapsed < s.windowSize {
		weight = float64(s.windowSize-elapsed) / float64(s.windowSize)
	} else {
		weight = 0
	}

	// Estimate count in sliding window
	estimated := (float64(s.previousCount) * weight) + float64(s.currentCount)
	if estimated >= float64(s.limit) {
		return false // Reject
	}

	s.currentCount++
	return true // Allow
}

// RateLimiterMiddleware is Echo middleware that enforces the sliding window counter.
func RateLimiterMiddleware(limiter *SlidingWindowCounter) echo.MiddlewareFunc {
	return func(next echo.HandlerFunc) echo.HandlerFunc {
		return func(c echo.Context) error {
			if !limiter.AllowRequest() {
				return echo.NewHTTPError(http.StatusTooManyRequests, "Rate limit exceeded")
			}
			return next(c)
		}
	}
}

func main() {
	e := echo.New()

	// Add basic middleware (optional, for logging)
	e.Use(middleware.Logger())
	e.Use(middleware.Recover())

	// Initialize the rate limiter: 5 requests per 60 seconds
	limiter := NewSlidingWindowCounter(5, 60)

	// Apply the rate limiter middleware globally
	e.Use(RateLimiterMiddleware(limiter))

	// Sample route
	e.GET("/", func(c echo.Context) error {
		return c.JSON(http.StatusOK, echo.Map{
			"message": "Hello Bro!",
		})
	})

	// Start the server
	e.Logger.Fatal(e.Start(":8080"))
}
Testing:
Open this address in your browser:
http://localhost:8080
Refresh times and you will see you are rate limited.
Sliding Window Counter Algorithm In Python and FastAPI
Below is a complete code example implementing the Sliding Window Counter Algorithm as rate-limiting middleware in Python, using the FastAPI framework.
I’ve kept it simple and in-memory for demonstration purposes (suitable for a single-instance app). In a production environment, you’d want to use a distributed store like Redis to handle counters across multiple instances and ensure atomicity (e.g., via Redis hashes with expiration or atomic increments). I’ve added comments for clarity and notes on potential improvements.
Here is the code:
import time
from threading import Lock

from fastapi import FastAPI, Request, status
from fastapi.responses import JSONResponse
from starlette.middleware.base import BaseHTTPMiddleware, RequestResponseEndpoint


class SlidingWindowCounter:
    def __init__(self, limit: int, window_size: int):
        self.limit = limit  # e.g., 100 requests
        self.window_size = window_size  # e.g., 60 seconds
        self.current_count = 0
        self.previous_count = 0
        self.window_start = int(time.time())
        self.lock = Lock()  # For thread safety

    def allow_request(self) -> bool:
        now = int(time.time())

        # Check if we've moves to a new window
        if now >= self.window_start + self.window_size:
            self.previous_count = self.current_count
            self.current_count = 0
            self.window_start = now  # Or align to fixed boundaries for consistenncy

        # Calculate elapsed time and weight
        elapsed = now - self.window_start
        weight = (
            (self.window_size - elapsed) / self.window_size
            if elapsed < self.window_size
            else 0.0
        )

        estimated = (self.previous_count + weight) + self.current_count

        if estimated >= self.limit:
            return False  # Reject

        self.current_count += 1
        return True  # Allow


# RateLimiterMiddleware is a Starlette middleware that enforces the sliding window counter.
class RateLimiterMiddleware(BaseHTTPMiddleware):
    def __init__(self, app, limiter: SlidingWindowCounter):
        super().__init__(app)
        self.limiter = limiter

    async def dispatch(self, request: Request, call_next: RequestResponseEndpoint):
        if not self.limiter.allow_request():
            return JSONResponse(
                status_code=status.HTTP_429_TOO_MANY_REQUESTS,
                content={"detail": "Rate limit exceeded"},
            )
        return await call_next(request)


# Create the FastAPI app
app = FastAPI()

# Initialize the rate limiter: 5 requests per 60 seconds
limiter = SlidingWindowCounter(limit=5, window_size=60)

# Apply the rate limiter middleware globally
app.add_middleware(RateLimiterMiddleware, limiter=limiter)


# Sample Route
@app.get("/")
async def root():
    return {"message": "Hello, Bro!"}


if __name__ == "__main__":
    import uvicorn

    uvicorn.run(app, host="0.0.0.0")
Testing
The first ~5 requests in a 60-second window will succeed. Additional ones will return a 429 error until the window slides and old requests “age out.” Check the FastAPI docs at http://127.0.0.1:8000/docs for interactive testing.
Conclusion: Slide Your Way to Better Systems
The Sliding Window Counter Algorithm isn’t just a tool—it’s a mindset shift toward proactive, precise traffic management. By blending simplicity with sophistication, it helps you build resilient systems that scale without sacrificing fairness or performance. Whether you’re safeguarding a startup API or optimizing a enterprise monolith, mastering this algorithm will elevate your engineering game.
Leave a Reply