
If you’ve ever built a web application, you know that authentication and authorization are two of the hardest things to get right. Rolling your own auth system is a security minefield — password hashing, token management, session handling, brute-force protection, multi-factor authentication… the list goes on.
This is exactly where Keycloak shines.
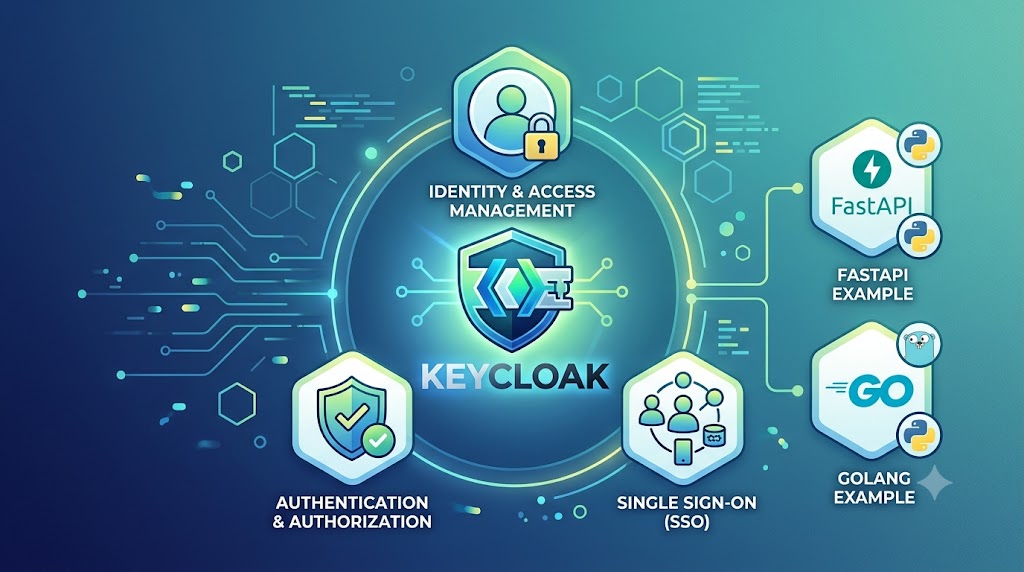
In this comprehensive guide, we’ll explore what Keycloak is, why it has become the de facto standard for open-source Identity and Access Management (IAM), and — most importantly — how to integrate it with two of the most popular backend stacks today: Python’s FastAPI and Golang’s net/http.
Table of Contents:
- What is Keycloak?
- Core Concepts You Must Understand
- Setting Up Keycloak with Docker
- Integrating Keycloak with FastAPI
- Integrating Keycloak with Golang
- Role-Based Access Control (RBAC)
- Best Practices for Production
What is Keycloak?
Keycloak is an open-source Identity and Access Management solution developed by Red Hat and now a CNCF incubating project. It provides out-of-the-box support for:
- Single Sign-On (SSO) and Single Logout
- OpenID Connect (OIDC), OAuth 2.0, and SAML 2.0
- User Federation (LDAP and Active Directory)
- Social Login (Google, GitHub, Facebook, etc.)
- Multi-Factor Authentication (MFA)
- Fine-grained Authorization Services
- Admin Console & Account Management UI
Instead of writing authentication logic in every microservice, you delegate it to Keycloak. Your services simply validate tokens — that’s it.
Core Concepts You Must Understand
Before diving into code, let’s clarify the terminology. Getting these right will save you hours of confusion:
| Concept | Description |
|---|---|
| Realm | An isolated tenant. Users, clients, and roles in one realm are invisible to another. |
| Client | An application that requests authentication (your FastAPI or Go app). |
| Client Scopes | Reusable sets of claims/mappers shared across clients. |
| Roles | Permissions assigned to users — either realm roles or client roles. |
| Access Token | A short-lived JWT your API validates on every request. |
| Refresh Token | A longer-lived token used to obtain new access tokens. |
| Identity Provider (IdP) | External login sources (e.g., Google) brokered through Keycloak. |
The OIDC Flow in a Nutshell
For a typical API-backend scenario, the flow looks like this:
- User → authenticates with Keycloak (login page or direct grant)
- Keycloak → issues an Access Token (JWT)
- User → calls your API with: Authorization: Bearer <token>
- Your API → validates the JWT signature against Keycloak’s public keys (JWKS)
- Your API → checks roles/claims → serves the response
The critical insight: your API never sees a password. It only verifies cryptographically signed tokens.
Setting Up Keycloak with Docker
The fastest way to get started is Docker. Create a docker-compose.yml:
services:
  postgres:
    image: postgres:16
    environment:
      POSTGRES_DB: keycloak
      POSTGRES_USER: keycloak
      POSTGRES_PASSWORD: kc_password
    volumes:
      - kc_pgdata:/var/lib/postgresql/data

  keycloak:
    image: quay.io/keycloak/keycloak:26.0
    command: start-dev
    environment:
      KC_DB: postgres
      KC_DB_URL: jdbc:postgresql://postgres:5432/keycloak
      KC_DB_USERNAME: keycloak
      KC_DB_PASSWORD: kc_password
      KC_BOOTSTRAP_ADMIN_USERNAME: admin
      KC_BOOTSTRAP_ADMIN_PASSWORD: admin
    ports:
      - "8080:8080"
    depends_on:
      - postgres

volumes:
  kc_pgdata:
Run it:
docker compose up -dThen open http://localhost:8080 and log in with admin/admin.
Initial Configuration
- Create a Realm → name it
myapp - Create a Client:
- Client ID:
myapp-api - Client authentication: ON (confidential client)
- Valid redirect URIs:
http://localhost:8000/*
- Client ID:
- Create a Realm Role → e.g.,
adminanduser - Create a User → set a password under the Credentials tab, and assign roles under Role Mapping
Important endpoints for the myapp realm:
Discovery: http://localhost:8080/realms/myapp/.well-known/openid-configuration
Token: http://localhost:8080/realms/myapp/protocol/openid-connect/token
JWKS: http://localhost:8080/realms/myapp/protocol/openid-connect/certs
Integrating Keycloak with FastAPI
Let’s build a FastAPI service that validates Keycloak-issued JWTs.
Install Dependencies
pip install fastapi uvicorn python-jose[cryptography] httpxProject Structure
fastapi-keycloak/
├── main.py
├── auth.py
└── config.py
config.py — Configuration
from pydantic_settings import BaseSettings


class Settings(BaseSettings):
    keycloak_url: str = "http://localhost:8080"
    realm: str = "myapp"
    client_id: str = "myapp-api"
    client_secret: str = "your-client-secret"

    @property
    def jwks_url(self) -> str:
        return f"{self.keycloak_url}/realms/{self.realm}/protocol/openid-connect/certs"

    @property
    def issuer(self) -> str:
        return f"{self.keycloak_url}/realms/{self.realm}"


settings = Settings()
auth.py — Token Validation Logic
This is the heart of the integration. We fetch Keycloak’s JWKS (JSON Web Key Set), cache it, and use it to verify the token signature:
import httpx
from fastapi import Depends, HTTPException, status
from fastapi.security import HTTPAuthorizationCredentials, HTTPBearer
from jose import JWTError, jwt

from config import settings

bearer_scheme = HTTPBearer()

# Simple in-memory JWKS cache
_jwks_cache: dict | None = None


async def get_jwks() -> dict:
    """Fetch and cache Keycloak's public keys."""
    global _jwks_cache
    if _jwks_cache is None:
        async with httpx.AsyncClient() as client:
            resp = await client.get(settings.jwks_url)
            resp.raise_for_status()
            _jwks_cache = resp.json()
    return _jwks_cache


async def get_current_user(
    credentials: HTTPAuthorizationCredentials = Depends(bearer_scheme),
) -> dict:
    """Validate the JWT and return its decoded claims."""
    token = credentials.credentials
    jwks = await get_jwks()

    try:
        # Find the matching public key by 'kid' (Key ID)
        unverified_header = jwt.get_unverified_header(token)
        key = next(
            (k for k in jwks["keys"] if k["kid"] == unverified_header["kid"]),
            None,
        )
        if key is None:
            raise HTTPException(
                status_code=status.HTTP_401_UNAUTHORIZED,
                detail="Unknown signing key",
            )

        payload = jwt.decode(
            token,
            key,
            algorithms=["RS256"],
            issuer=settings.issuer,
            audience="account",  # adjust based on your client config
        )
        return payload

    except JWTError as exc:
        raise HTTPException(
            status_code=status.HTTP_401_UNAUTHORIZED,
            detail=f"Invalid token: {exc}",
            headers={"WWW-Authenticate": "Bearer"},
        )


def require_role(role: str):
    """Dependency factory for role-based access control."""
    async def role_checker(user: dict = Depends(get_current_user)) -> dict:
        realm_roles = user.get("realm_access", {}).get("roles", [])
        if role not in realm_roles:
            raise HTTPException(
                status_code=status.HTTP_403_FORBIDDEN,
                detail=f"Role '{role}' required",
            )
        return user
    return role_checker
main.py — The API
from fastapi import Depends, FastAPI

from auth import get_current_user, require_role

app = FastAPI(title="Keycloak + FastAPI Demo")


@app.get("/public")
async def public_route():
    return {"message": "Anyone can see this."}


@app.get("/me")
async def read_me(user: dict = Depends(get_current_user)):
    return {
        "username": user.get("preferred_username"),
        "email": user.get("email"),
        "roles": user.get("realm_access", {}).get("roles", []),
    }


@app.get("/admin")
async def admin_only(user: dict = Depends(require_role("admin"))):
    return {"message": f"Welcome, admin {user.get('preferred_username')}!"}
Testing It
Get a token using the Resource Owner Password Credentials flow (great for testing, avoid in production):
curl -X POST "http://localhost:8080/realms/myapp/protocol/openid-connect/token" \
  -d "client_id=myapp-api" \
  -d "client_secret=your-client-secret" \
  -d "grant_type=password" \
  -d "username=testuser" \
  -d "password=testpass"
Then call your protected endpoint:
curl http://localhost:8000/me \
  -H "Authorization: Bearer <ACCESS_TOKEN>"
Integrating Keycloak with Golang
Now let’s do the same with Go using the standard net/http package plus the excellent coreos/go-oidc library — which handles JWKS fetching, key rotation, and signature verification for you.
Install Dependencies
go mod init keycloak-demo
go get github.com/coreos/go-oidc/v3/oidc
main.go — Full Working Example
package main

import (
	"context"
	"encoding/json"
	"log"
	"net/http"
	"strings"

	"github.com/coreos/go-oidc/v3/oidc"
)

const (
	keycloakURL = "http://localhost:8080/realms/myapp"
	clientID    = "myapp-api"
)

// Claims we care about from the Keycloak access token
type KeycloakClaims struct {
	PreferredUsername string `json:"preferred_username"`
	Email             string `json:"email"`
	RealmAccess       struct {
		Roles []string `json:"roles"`
	} `json:"realm_access"`
}

// contextKey avoids collisions in context values
type contextKey string

const claimsKey contextKey = "claims"

func main() {
	ctx := context.Background()

	// The provider fetches the OIDC discovery document and JWKS,
	// and handles key rotation automatically.
	provider, err := oidc.NewProvider(ctx, keycloakURL)
	if err != nil {
		log.Fatalf("failed to create OIDC provider: %v", err)
	}

	verifier := provider.Verifier(&oidc.Config{
		// Keycloak access tokens often use "account" as audience.
		// Set SkipClientIDCheck if you validate audience manually.
		ClientID: "account",
	})

	mux := http.NewServeMux()

	// Public route — no authentication
	mux.HandleFunc("GET /public", func(w http.ResponseWriter, r *http.Request) {
		writeJSON(w, http.StatusOK, map[string]string{
			"message": "Anyone can see this.",
		})
	})

	// Protected route — requires a valid token
	mux.Handle("GET /me", authMiddleware(verifier, http.HandlerFunc(meHandler)))

	// Admin route — requires the "admin" realm role
	mux.Handle("GET /admin",
		authMiddleware(verifier,
			requireRole("admin", http.HandlerFunc(adminHandler)),
		),
	)

	log.Println("Server listening on :8000")
	log.Fatal(http.ListenAndServe(":8000", mux))
}

// authMiddleware validates the Bearer token and injects claims into context.
func authMiddleware(verifier *oidc.IDTokenVerifier, next http.Handler) http.Handler {
	return http.HandlerFunc(func(w http.ResponseWriter, r *http.Request) {
		authHeader := r.Header.Get("Authorization")
		if !strings.HasPrefix(authHeader, "Bearer ") {
			writeJSON(w, http.StatusUnauthorized, map[string]string{
				"error": "missing or malformed Authorization header",
			})
			return
		}

		rawToken := strings.TrimPrefix(authHeader, "Bearer ")

		// Verify signature, expiry, and issuer against Keycloak's JWKS
		token, err := verifier.Verify(r.Context(), rawToken)
		if err != nil {
			writeJSON(w, http.StatusUnauthorized, map[string]string{
				"error": "invalid token: " + err.Error(),
			})
			return
		}

		var claims KeycloakClaims
		if err := token.Claims(&claims); err != nil {
			writeJSON(w, http.StatusUnauthorized, map[string]string{
				"error": "failed to parse claims",
			})
			return
		}

		// Inject claims into the request context
		ctx := context.WithValue(r.Context(), claimsKey, claims)
		next.ServeHTTP(w, r.WithContext(ctx))
	})
}

// requireRole checks for a realm role in the already-validated claims.
func requireRole(role string, next http.Handler) http.Handler {
	return http.HandlerFunc(func(w http.ResponseWriter, r *http.Request) {
		claims, ok := r.Context().Value(claimsKey).(KeycloakClaims)
		if !ok {
			writeJSON(w, http.StatusInternalServerError, map[string]string{
				"error": "claims not found in context",
			})
			return
		}

		for _, r := range claims.RealmAccess.Roles {
			if r == role {
				next.ServeHTTP(w, r0(r, w)) // see note below
				return
			}
		}

		writeJSON(w, http.StatusForbidden, map[string]string{
			"error": "role '" + role + "' required",
		})
	})
}

func meHandler(w http.ResponseWriter, r *http.Request) {
	claims := r.Context().Value(claimsKey).(KeycloakClaims)
	writeJSON(w, http.StatusOK, map[string]any{
		"username": claims.PreferredUsername,
		"email":    claims.Email,
		"roles":    claims.RealmAccess.Roles,
	})
}

func adminHandler(w http.ResponseWriter, r *http.Request) {
	claims := r.Context().Value(claimsKey).(KeycloakClaims)
	writeJSON(w, http.StatusOK, map[string]string{
		"message": "Welcome, admin " + claims.PreferredUsername + "!",
	})
}

func writeJSON(w http.ResponseWriter, status int, v any) {
	w.Header().Set("Content-Type", "application/json")
	w.WriteHeader(status)
	_ = json.NewEncoder(w).Encode(v)
}
Correction on the snippet above — the requireRole loop shadows the *http.Request variable r. Here’s the clean, correct version:
func requireRole(role string, next http.Handler) http.Handler {
	return http.HandlerFunc(func(w http.ResponseWriter, req *http.Request) {
		claims, ok := req.Context().Value(claimsKey).(KeycloakClaims)
		if !ok {
			writeJSON(w, http.StatusInternalServerError, map[string]string{
				"error": "claims not found in context",
			})
			return
		}

		for _, userRole := range claims.RealmAccess.Roles {
			if userRole == role {
				next.ServeHTTP(w, req)
				return
			}
		}

		writeJSON(w, http.StatusForbidden, map[string]string{
			"error": "role '" + role + "' required",
		})
	})
}
💡 A note on pointers here: notice that
oidc.NewProviderreturns a*oidc.Provider— a pointer to a provider. We pass&oidc.Config{...}(the&operator takes the address of the struct literal) becauseprovider.Verifierexpects a*oidc.Config. The*in the type declaration means “pointer to,” while&in an expression means “give me the address of.” This pattern — libraries accepting pointers so they can share one instance without copying — is everywhere in Go’snet/httpecosystem (e.g.,*http.Request).
Why go-oidc Instead of Manual JWT Parsing?
You could parse JWTs manually with golang-jwt/jwt, but go-oidc gives you for free:
- Automatic JWKS fetching and key rotation — Keycloak rotates signing keys;
go-oidcre-fetches keys when it encounters an unknownkid. - OIDC Discovery — issuer, endpoints, and algorithms are read from
.well-known/openid-configuration. - Issuer and expiry validation built in.
Testing the Go Service
# Get a token (same as before)
TOKEN=$(curl -s -X POST "http://localhost:8080/realms/myapp/protocol/openid-connect/token" \
  -d "client_id=myapp-api" \
  -d "client_secret=your-client-secret" \
  -d "grant_type=password" \
  -d "username=testuser" \
  -d "password=testpass" | jq -r .access_token)

# Call protected endpoints
curl http://localhost:8000/me -H "Authorization: Bearer $TOKEN"
curl http://localhost:8000/admin -H "Authorization: Bearer $TOKEN"
Role-Based Access Control (RBAC): FastAPI vs. Go Side-by-Side
Both implementations follow the exact same pattern — only the idioms differ:
| Concern | FastAPI | Golang |
|---|---|---|
| Token extraction | HTTPBearer security scheme | Manual Authorization header parsing |
| Signature verification | python-jose + manual JWKS cache | go-oidc (automatic JWKS + rotation) |
| Role enforcement | Dependency factory require_role("admin") | Middleware wrapper requireRole("admin", next) |
| Passing user data | Return value of the dependency | context.Context value |
The Keycloak token structure is identical in both cases — realm roles live in:
{
  "realm_access": {
    "roles": ["admin", "user", "offline_access"]
  },
  "resource_access": {
    "myapp-api": { "roles": ["client-specific-role"] }
  }
}
Use realm roles for organization-wide permissions and client roles (resource_access) for per-application permissions.
Best Practices for Production
Before you ship this, check these boxes:
- Never use
start-devin production. Usestartwith proper TLS (KC_HOSTNAME,KC_HTTPS_CERTIFICATE_FILE) or terminate TLS at a reverse proxy withKC_PROXY_HEADERS=xforwarded. - Avoid the password grant. The Resource Owner Password Credentials flow is deprecated in OAuth 2.1. Use Authorization Code Flow with PKCE for user-facing apps and Client Credentials for service-to-service calls.
- Keep access tokens short-lived (≤5 minutes is a common baseline) and rely on refresh tokens.
- Handle key rotation. The naive JWKS cache in our FastAPI example never expires — in production, add a TTL and re-fetch on unknown
kid. (The Go example already handles this viago-oidc.) - Validate the audience (
aud) claim. Configure an audience mapper in Keycloak so tokens are explicitly issued for your API, and reject tokens meant for other clients. - Use a real database and backups. PostgreSQL (as in our Compose file) — never the default dev-file store.
- Enable health and metrics endpoints (
KC_HEALTH_ENABLED=true,KC_METRICS_ENABLED=true) for Kubernetes probes and Prometheus. - One realm per environment (dev/staging/prod), exported as JSON via
kc.sh exportfor reproducible, GitOps-friendly configuration.